Mt. Rainier is one of the reasons I got into mountaineering. First of all, it’s famous. You just cannot miss it if you’ve ever been to the Seattle area. Plus, the promised view was iconic. They say you can see as far as Mt. Hood at the top.
On the day of July 1st, 2024 I defended my PhD thesis and then took off on my almost-a-month-long adventure to the west the very next day. Around that time I was very actively asking people I know about the snow conditions on Rainier. I packed my touring gears, in the hope that I will be able to skin and ski a fair portion of the mountain, or at least from Camp Muir to the parking lot. I had also heard on RedNote (which I’m not a huge fan of) that the snow level was pretty close to the parking lot. It turned out I was too naïve at that point.
On July 12th, we moved from the Olympics Peninsula to Rainier. While we were on the drive, we got a call from Jacek. He just returned from the ranger station at Paradise and had some not-so-great news. A key snow bridge on the Disappointment Cleaver (DC) route has collapsed. Some guides tried to bring a ladder up, but to find out the crevasse was too wide and they needed a longer ladder. In short, they couldn’t fix it tomorrow, and we had to change our plans.
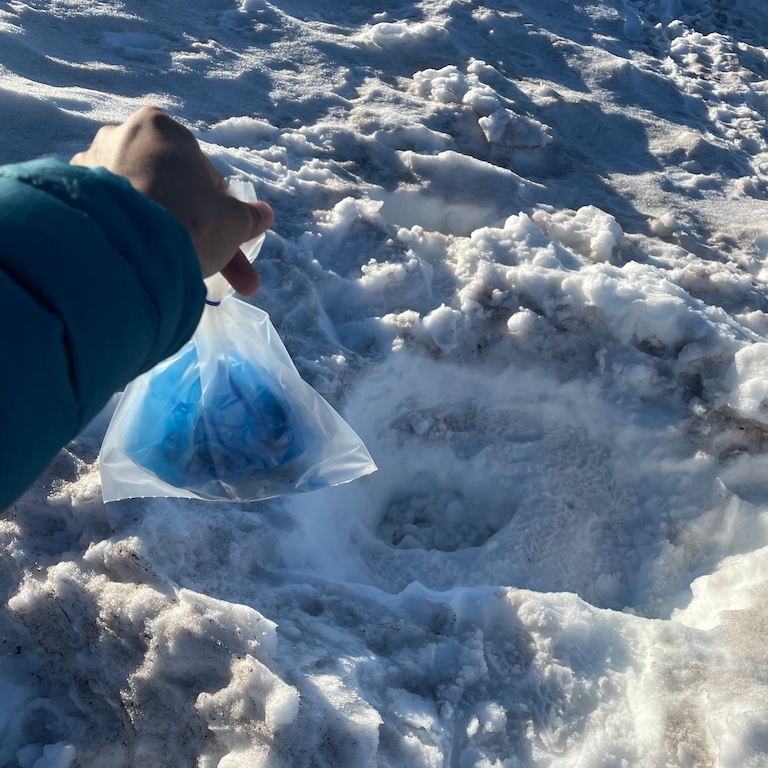
This climb was part of our western outing with the Chicago Mountaineering Club. We had a huge group of 11 people for this mountain, and the original plan was to climb the classic DC route via Camp Muir. Jacek, the expedition chair of the club, told us when they drove past the Rainier for the Olympics just a week ago, snow was everywhere. But just within that week the low altitude snow had almost melted out. Luckily, we managed to get a last-minute permit for the Emmons Glacier route. But here’s the bad news: my skis are totally out of date now. We still stopped at the Paradise visitor center to stamp my national park passport and grab some blue bags to collect poops.
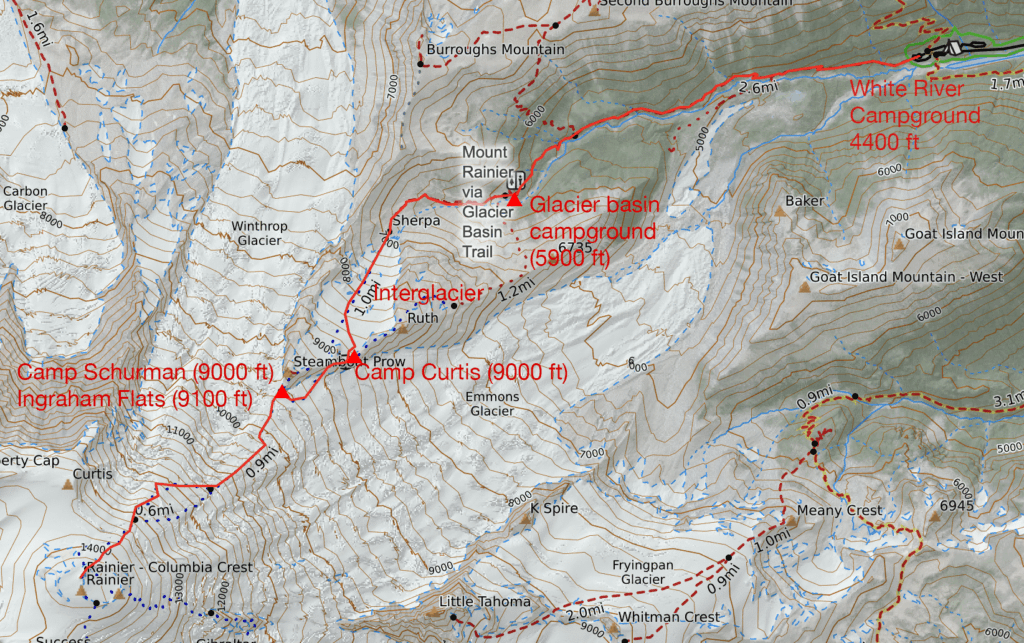
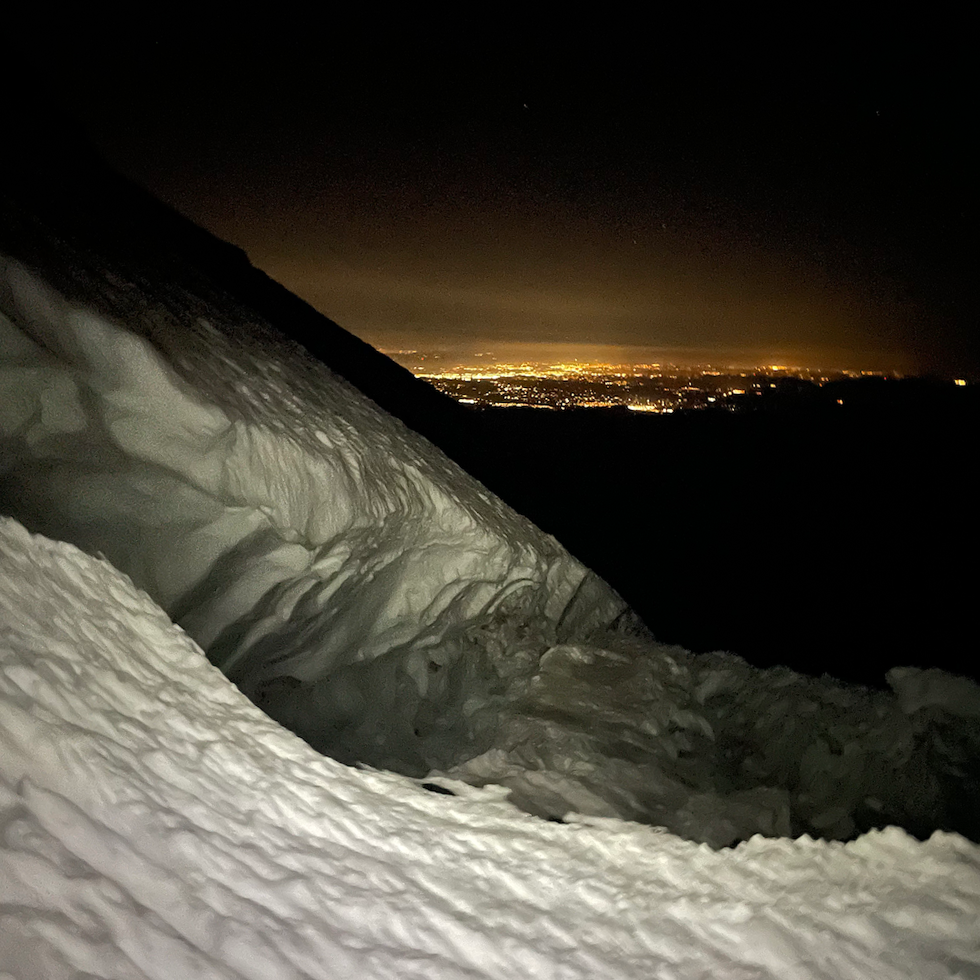
That night we camped at the White River campground, right inside the Sunrise entrance. When we got there, the rangers had already left, and we did a quick self registration. There’s a reason we paid extra to camp there – we need to beat the traffic that comes for Sunrise the next morning. If we had camped outside the park, there could’ve been an hour-long line outside the entrance the next day. The sudden change of plans also caused a bit of logistical stir. We had to extend the rental car, and we ended up sharing some food because of the extended trip. T-Mobile reception was available until super close to the park. I think it’s coming from the ski resort Crystal Mountain next to it. (Actually, CalTopo has a really good map of cell reception. It says T-mobile signal is pretty much everywhere on the unobstructed east side slopes and it was indeed the case!)
The itinerary we got was as follows:
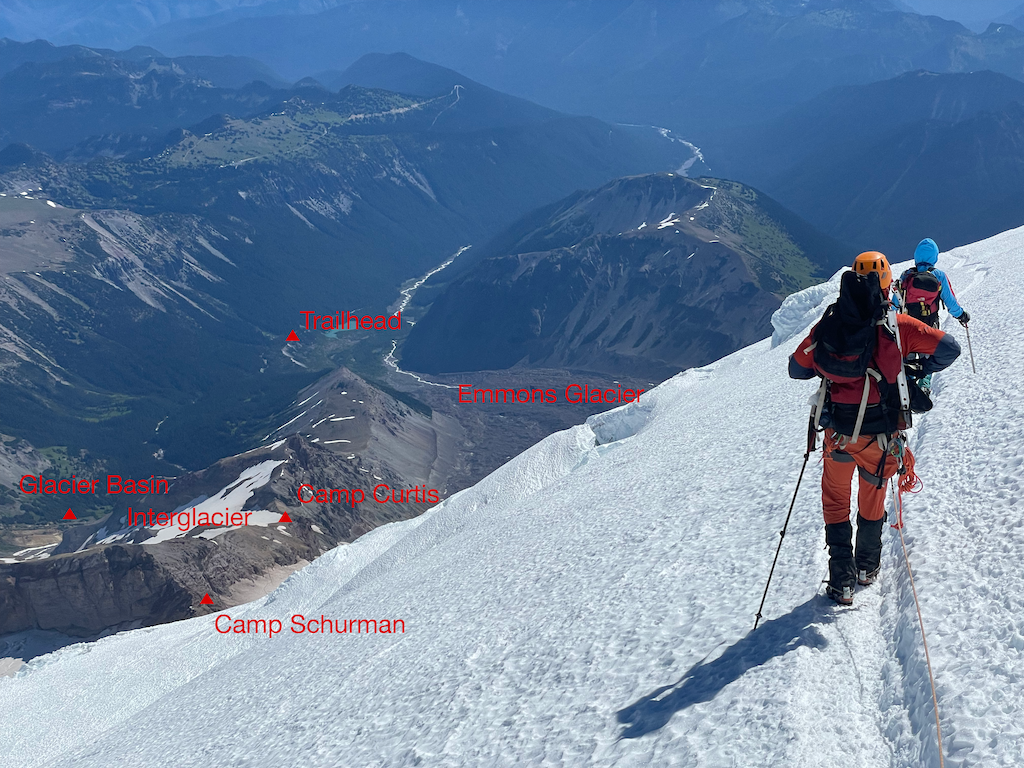
Day 1: From White River Campground to Camp Curtis, the ridgeline above Interglacier.
Day 2: A really short day to move to Ingraham Flat and set up camp.
Day 3, or around 11 pm of Day2: start the summit push and get back.
Day 1
We kicked off the climb around 9:30 am, feeling refreshed with a good sleep after a lot of beers and some campfire stories the previous night. First thing of the day was to tear down the camp and secure a prime parking spot at the trail head, as they tend to fill up swiftly. The trail head is only like a 10-minute walk from the camp, but if you can park closer, why not? This extra 10 minutes can be daunting when coming down, and we all know how it feels.
The first part of our journey was just a short hike on maintained trail to the Glacier Basin campground. Here’s a valuable lesson I learned during our first day. The climb after Glacier Basin was expected to be a smooth, straight ascent of approximately 3,100 feet elevation gain, while the following day promises to be a short day. This means we can arrive at the campsite late without feeling rushed. To beat the scorching afternoon heat, we decided to seek shelter under some shade at the campsite until 3:30 pm. It was my first time climbing with some of these guys, so it turned out to be a wonderful opportunity for us to bond and share stories.
The climb on Interglacier was also uneventful. Before we stepped on snow were some moderate scree and dirt trails. The last running water is also around there (but this can vary by season). On the glacier, we saw some people glissading down and stopped them to ask for conditions near the summit. Most didn’t like the snow conditions up there (remember this). There were very clear and good boot packs you can follow, so my recommendation is to climb this with hiking poles and without crampons. Crampons don’t do well on soft snow, and ice axes are simply not necessary and too short for this. There is no visible crevasse, and I didn’t see anyone roping up here. It was a right call to start this part in the late afternoon. Most of the climb was in shades, and winds were chill and could cool you down quickly.
We camped at a higher point on the ridge than Camp Curtis. The rest of our group camped lower right on the saddle.
Day 2
Day 2 was a short day, and we headed to Ingraham Flat or Camp Schurman, which were already in sight from last night’s camp. They’re the basically the same place, and where you camp depends really only on your permit. They’re just a 5-10 minute walk and 100 feet in elevation apart. On Camp Schurman, there’s a ranger station and a bin for thosd blue bags. They’ll fly them out by helicopter. The only difference is that if you really prefer camping on rock, there are some spots on Camp Schurman (at least for that time of the year). All other spots will be on snow.
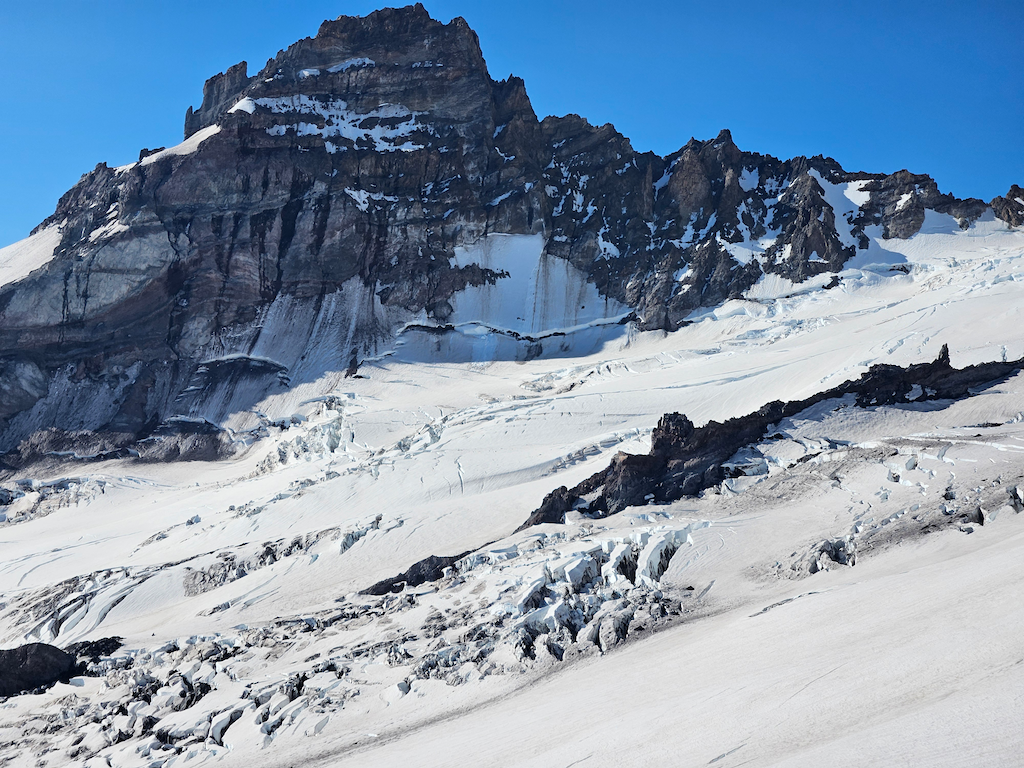
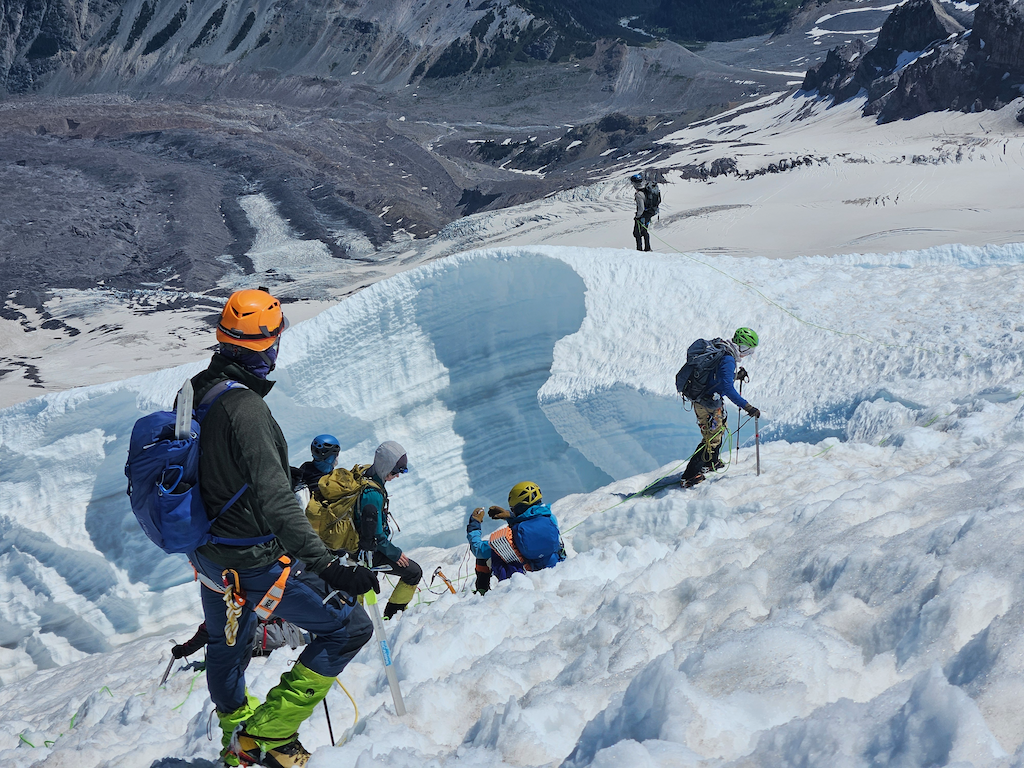
The day began with a steep drop from the ridge line to Emmons Glacier. Be super careful and stick to the trails to avoid sliding down on the screes. After you get on snow again this will be the first time you need to cross a crevasse. We did this without ropes and circumvented the open crevasse, but to be cautious or in the afternoon, you may want to rope up here.
When we got to the Ingraham Flat, we dug a spot for our tent and also dug a Chinese style squat toilet. It was at the lowest point in our camp, about a foot below the snow level. This was a game changer, as you can simply put the blue bag down and do your business without everybody seeing your butt. In July you will also see some deep crevasse very close to your camp, so be really careful when moving around.
This was also the time I realized pump style water filter could get really handy for alpine climbs, although they can be heavy. When water needs to be collected from melting snow (whether using a Jetboil or a pot), if with a water bag + filter system, you need to do it in batches. To save gas and stay safe, you’ll need to stop the stove after the snow melts and pour water into the bag to filter it into your Nalgene (inevitably it spills a little). But with a pump-style filter, you can simply tuck the inlet pipe into the stove and pump as the snow melts. This is like the upgrade from batch-style to continuous flow reactors in chemical engineering – a huge improvement in efficiency!
The afternoon we spent sometime doing preparations such as melting snow, packing, and some practice. This was also a good time to decide who ropes up with who and the sequence on the rope, since we had such a large group.
Day 3
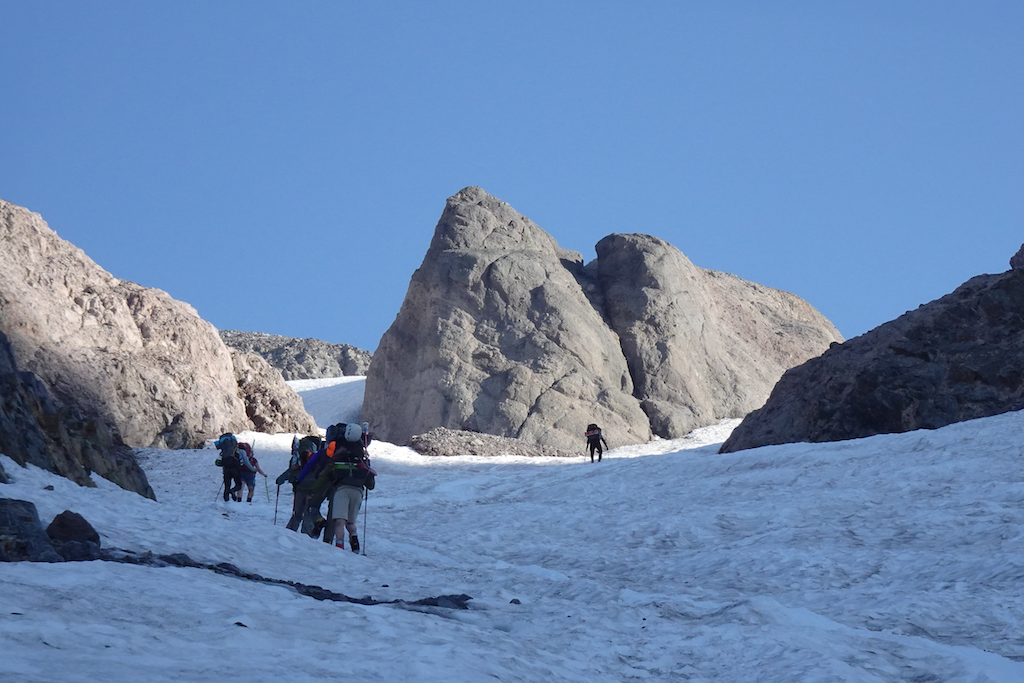
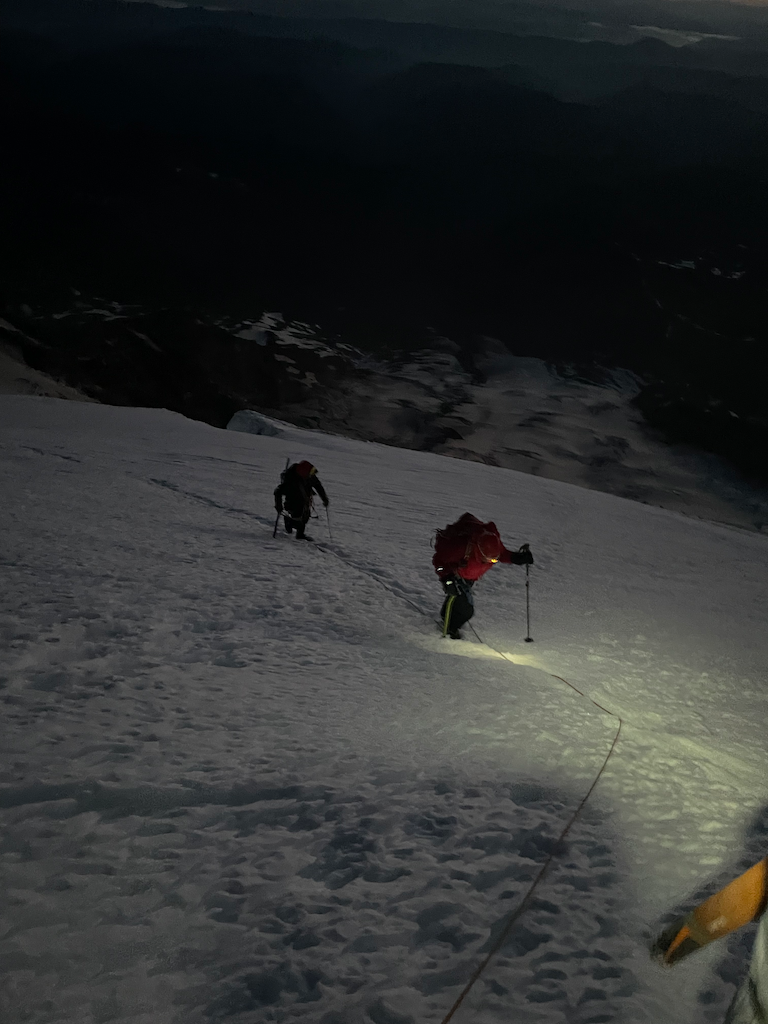
We got up around 11 pm after four hours of sleep and started around 11:30 pm. I had a late night breakfast and a cup of hot tea and we roped up and departed. By then, there was already another group in front of us, so we basically followed their path. The first segment was some broadway snowfield, then a few steep and crevasse filled sections.
We climbed at a very, very slow pace, but we barely stopped in the entire seven hours. Initially, I thought a base layer and a soft shell jacket would be enough, but I ended up putting a down jacket outside the soft shell, and I was still freezing! Layering it inside the jacket should’ve been better, but we didn’t stop at all, so I didn’t have time to make big changes like that.
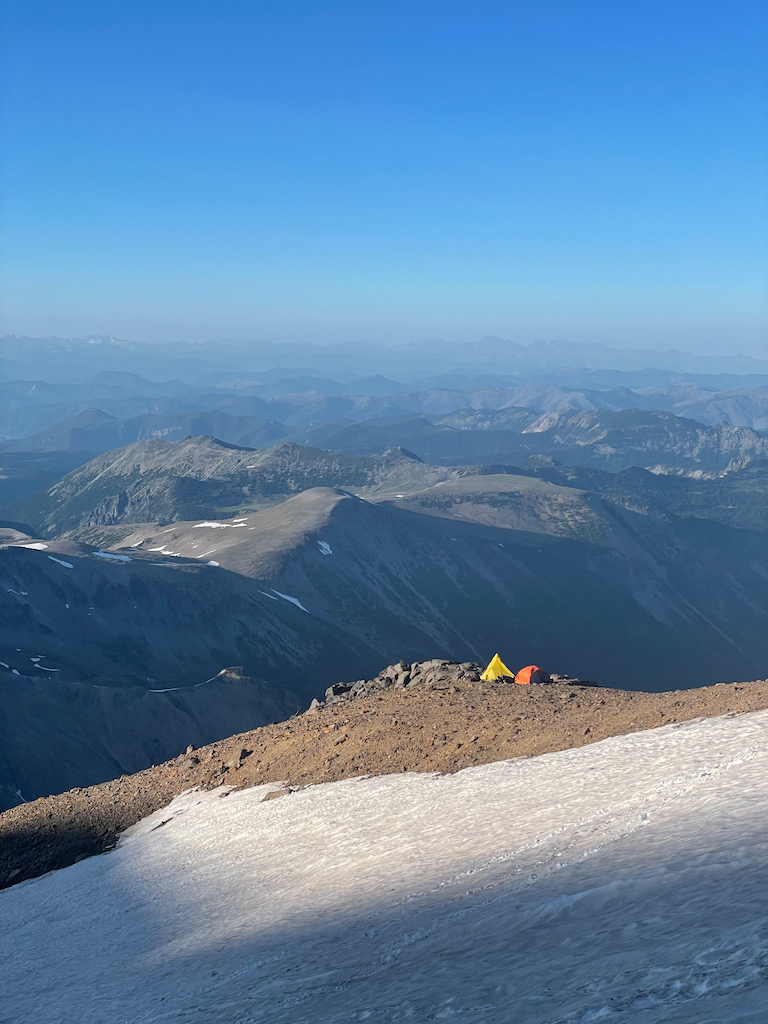
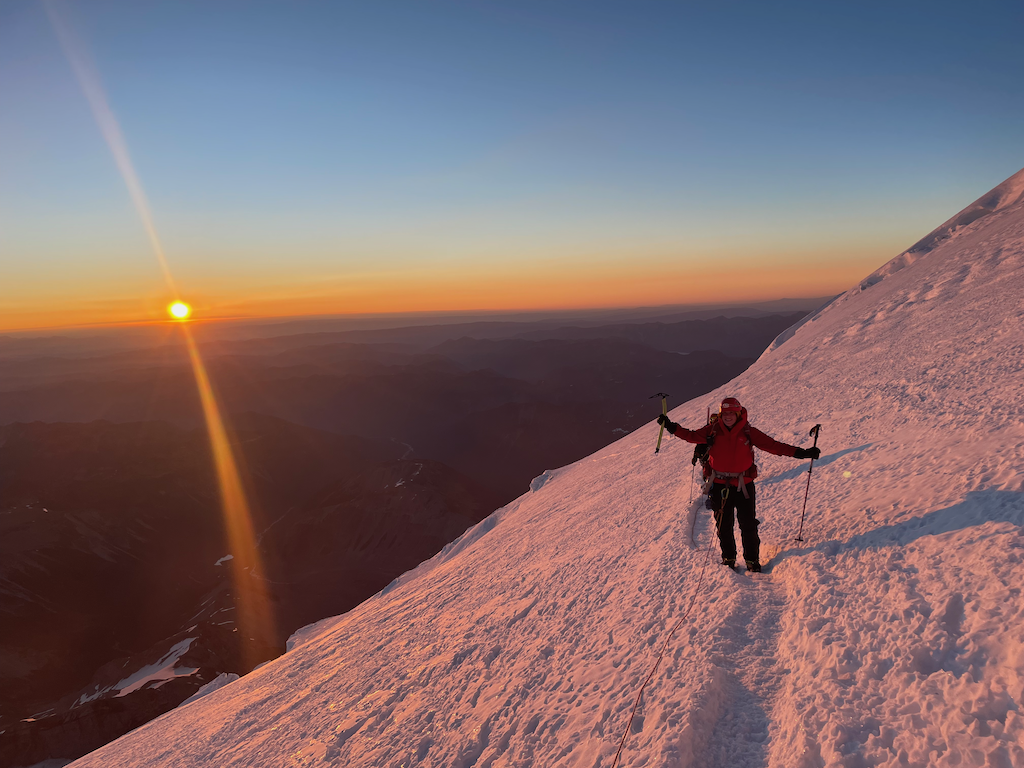
As we climbed to about 13,000 feet, the slope got mellower. There it was a like a really safe traverse heading towards the north west. I won’t go into specifics about the conditions, though, as they can vary from day to day. The sun rose around this time, painting the entire mountain in beautiful pink hues!
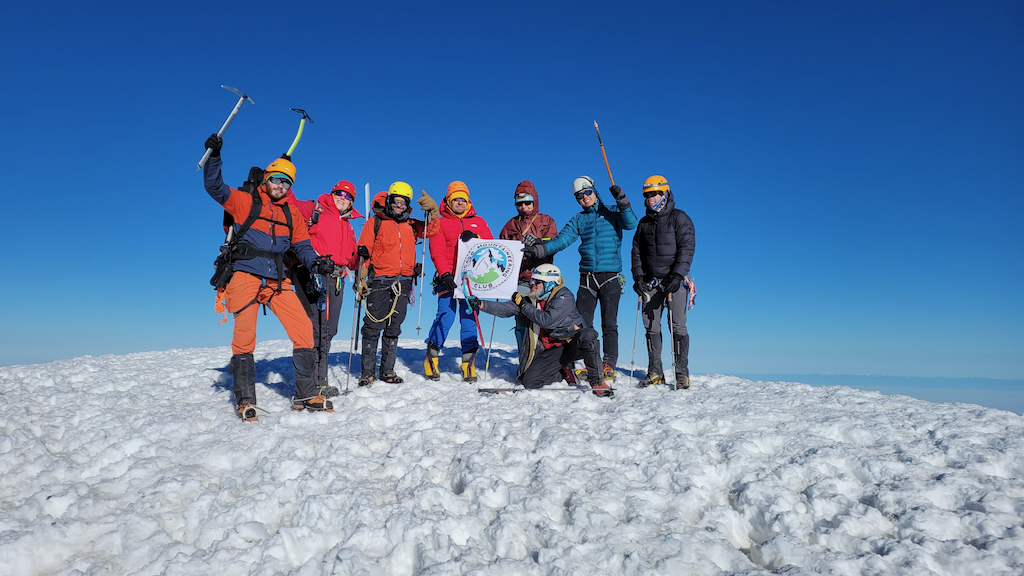
Around 6 am-ish we got to the head of that glacier, and climbed the last section of steep scree. We were approaching the summit from the north west side so the true summit was right there, unlike if you ascend from the DC route, you will need to go around the crater for the true summit. The only downside was we didn’t find the summit register. I Googled it up at the summit, and people said it was south of the crater. So, we gave up on the register and just took some photos. With the cell phone reception I even made a FaceTime call from the summit!
To be honest, the view from the top wasn’t as spectacular as I had imagined, even though the visibility was perfect. The reason was kind of surprising to me: when you’re standing on a 14er, the Seattle area actually looks pretty flat, despite having some iconic but sporadic volcanoes still lower than you. When you see a beautiful mountain landscape post of the Seattle area on social media, Rainier is often in it. But now you’re standing on Rainier, and this is literally the highest point of the vast area around it. You are in scenery instead of seeing it! On the north side, I could see Baker and Glacier Peak, and maybe Shuksan. On the south side, there was St. Helens, Hood, and Adams. I couldn’t remember if I could see Jefferson and the Sisters, and the answer is probably no.
Now, it’s time to descend. There was nothing too technical, but the worst part is that your tent should be visible soon (if not blown away by wind), but they were still over 4,000 feet below you. The snow was starting to soften, and it got hot really fast. And guess what? You’re feeling the effects of lack of sleep now.
The section with crevasse was more scary in the descent. Everything was getting softer as the day went on, and during the ascent, you probably couldn’t see them too well either.
We were back at the camp around 2 pm. There were 2 options, we could either descend after some rest, or we could stay another night. We had the permit so either was an option. I almost immediately fell asleep, and didn’t wake up until around 5 pm. The call was to stay another night.
We woke up around 6 am the next morning. After descending a bit along Emmons Glacier, we reached the spot where we needed to climb up some scree to get back on the ridge line again. This can be tricky on the way back. Usually, when you go downhill (like this time, during the outbound), you get a better view of the trail. But when you go uphill, poor visibility makes route finding way harder. Here if you get off the trail, you can easily end up in some class 4 terrain, and that was exactly what happened. It was a scary scramble with the whole backpack until I intercepted the established trail again. Scrambling class 4 with a big pack is no fun. Legs hurts, and the pack can limit your head movement and thus your vision. This is something I will try my best to avoid next time.
The rest of the return is easy. We glissaded down the Interglacier (I wish I had my skis!), and then it was just a hike. We even spotted a cute little cubbie on the trail. The hike was only about 2 miles once we hit the dirt, but it felt like it was forever. We all know how that feels, right?
Logistics
- Prepare enough food, so an extra night is possible.
- Standard mountaineering gear, harness, rope, and crevasse rescue gear
- A shovel. I brought my avalanche shovel with me.
- We were fortunate that the wind was pretty mild, but good anchors are definitely needed if you don’t want to lose your tent.
- Enough gas for melting snow.
- This is actually my first time camping at this altitude on snow. To be safe I brought both a foam pad (R=2.0) and an air pad (R=4.7), and layered both at camp. This is probably a good call as I can’t imagine with just an air pad on snow – It could be pretty cold. Plus the foam pad is also useful when you are just sitting on snow working on water. Of course it is bulky, but it is worth it.
- My backpack was 62 L and it was barely enough. I had to tie the foam pad on the outside and it wasn’t convenient.
Leave a Reply